

How Hair Toppers Stay Secure All Day Long?

Discover the clever ways hair toppers stay put—no glue, no panic!
Let's talk about one of the most common fears people have before trying a hair topper: "What if it falls off in public?" We've got many new customers ask how do hair toppers stay on your head. It's a totally valid concern—especially if you're new to hair enhancements and the idea of clipping something onto your head feels foreign (and a little scary).
But here's the truth: modern hair toppers, especially the newer mini hair topper designs, are built for comfort, confidence, and above all—security. They're not going anywhere unless you want them to.
In this blog, we're breaking down exactly how clip on hair toppers stay put, what options exist for different needs, and how to make sure yours is locked in for the long haul (yes, even during windy walks or a dancefloor moment).
Why This Even Matters: Hair Topper Anxiety is Real
Imagine walking into a date, job interview, or even a casual coffee meetup and constantly worrying, "Can they tell I'm wearing something? Is it slipping?" That kind of insecurity can seriously ruin your vibe—and your confidence.
But we promise you, when applied correctly, a hair volumizer like a topper doesn't just stay on—it becomes part of you. It lifts your look, your roots, and your mood. Let's dive into how that happens.
The Secret Hero: Pressure-Sensitive Clips
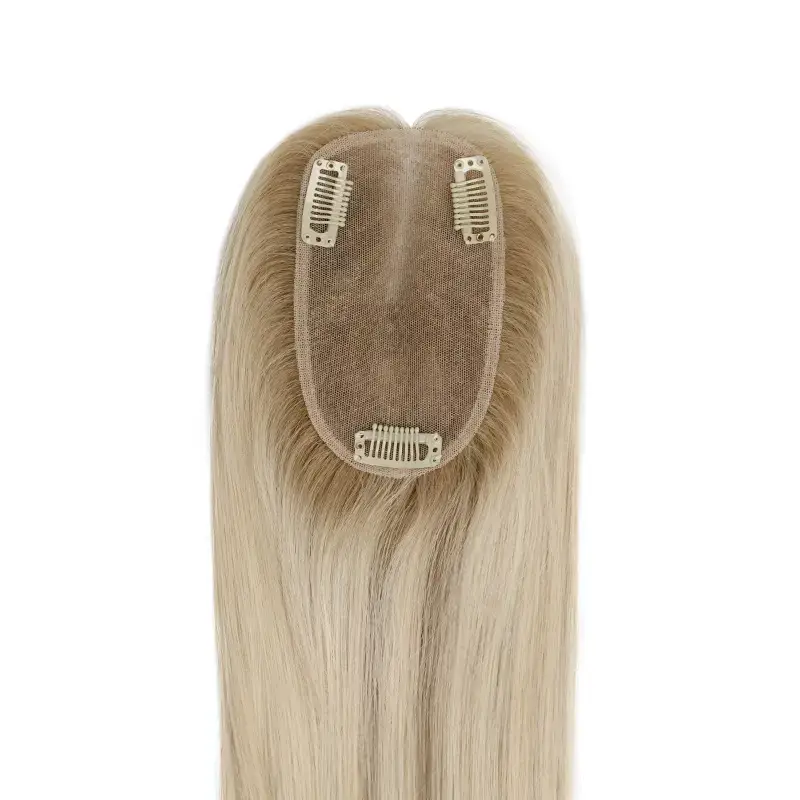
Let's start with the MVP of most clip on hair toppers—the humble pressure-sensitive clip. These aren't your average bobby pins or flimsy barrettes. These clips are specially engineered to grip securely to your natural hair without pulling, tugging, or causing damage. Here's how they work:
Snap Open. Snap Shut. You gently press the clip to open it, position it near the root of your natural hair, and snap it shut. It clicks into place, holding onto the strands beneath.
Multiple Clips = Even More Security. A mini hair topper might have 1–3 clips depending on its size. Larger toppers may have 4 or more. The idea is to evenly distribute weight and keep the piece flat and flush against your scalp.
Padded Comfort. Most clips are lined with soft silicone or fabric to cushion your scalp and prevent irritation—because nobody wants a painful hair day.
Once clipped in, the topper becomes one with your hair. You can shake your head, flip your hair, or even go for a jog (yes, really). With proper placement, it won't budge.
Clip-In Doesn't Mean One-Size-Fits-All
While clips are the go-to for most toppers, especially mini hair toppers, they're not the only option. Depending on your hair type, scalp sensitivity, or lifestyle, you might benefit from other methods. Let's explore them.
Alternative Attachment Methods for Hair Toppers
1. Adhesive Strips or Tapes
For individuals with very thin or no natural hair (due to alopecia, medical treatment, or other reasons), clips might not have anything to grip. That's where wig tape or medical-grade adhesive strips come in.
These are placed along the base of the topper and pressed against the scalp for a super strong hold. They're:
l Discreet and lightweight
l Long-lasting (some last all day or even multiple days)
l Easy to remove with proper solutions
Perfect for anyone needing a little extra staying power or scalp-on-skin application.
2. Wig Grips or Headbands
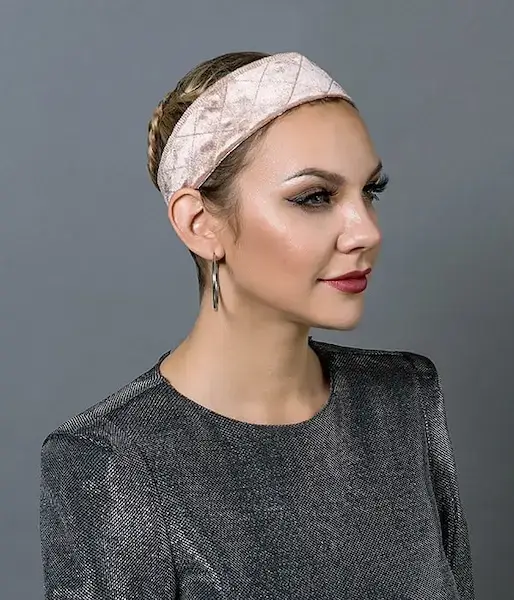
Think of these as the comfy sports bra of the hair world. Wig grips are soft, velvety bands worn around the hairline, creating friction to hold the topper in place—without adhesive or clips.
Great for:
l Sensitive scalps
l Protective styling
l Extra hold under clips or tape
3. Integration Systems (For Advanced Wearers)
Some wearers opt for more permanent or semi-permanent topper systems, where the piece is integrated with natural hair using micro-links or bonds. These require professional application and are typically used by people with significant hair thinning.
They're not for everyone, but worth exploring if you want a no-hassle daily look and are okay with salon maintenance.
How to Choose the Best Attachment for You
Every scalp and strand is different, so your attachment method should reflect your needs. Here's a cheat sheet:
|
Your Hair Situation |
Best Attachment Method |
|
Medium to thick hair |
Clip on hair topper |
|
Thinning crown or wide part |
Mini hair topper with clips or tape |
|
Sensitive scalp |
Wig grip band or soft-lined clips |
|
No hair / full hair loss |
Adhesive-based or integration system |
Still not sure? Start with a mini hair topper—they're lightweight, easy to try, and often come with adjustable clips. You can always level up later!
But... Do Hair Toppers Ever Slip?
Let's get real: Can a topper slip off? Technically, yes. But only under rare circumstances—like incorrect application, oily hair, or using too few clips.
Here's how to make sure that doesn't happen:
l Prep your hair. A bit of texturizing spray or dry shampoo at the roots gives clips something to grip.
l Place it right. Align the front of the topper with your natural part, or slightly behind the hairline for the most invisible blend.
l Tease it a little. Backcombing the area where clips will go creates a stronger base.
l Test it. Once it's clipped in, give it a little tug or head shake to ensure it's secure.
Most people report forgetting they're even wearing one—until someone compliments their hair, of course.
Appearanz Pro Tip Corner
We design every mini hair topper with real-life wear in mind. That means:
l Ultra-thin bases for invisible blending
l Lightweight comfort (you'll barely feel it)
l Strategic clip placement for natural movement
l Scalp-simulating lace or silk for a true-to-you look
Each hair volumizer we make is tested for durability, breathability, and—yes—shake-proof security. You can clip it in and live your life, no second-guessing needed. Want proof? Check out our quick tutorials and real customer reviews to see these beauties in action.
How to Apply a Clip On Hair Topper Like a Pro
You don't need a glam squad to wear your topper with confidence. Here's a step-by-step breakdown you can do at home:
1. Start with clean, dry hair. It doesn't have to be freshly washed—but oil-free roots help.
2. Locate your parting. Line up your topper's base with your natural part or area needing volume.
3. Clip front to back. Start by securing the front clip near your part. Then attach the side and back clips.
4. Blend. Use your fingers or a comb to blend your natural hair into the topper. Add a little root spray if needed.
5. Style as usual. Blow dry, curl, straighten—treat it like your own hair (because today, it is).
Final Thoughts: Confidence You Can Clip On
Wearing a mini hair topper isn't just about covering up thin spots or boosting volume. It's about walking out the door with your chin up, knowing your hair looks amazing—no matter the weather, no matter the occasion.
Yes, the question "Will it stay on?" is a natural one. But once you experience the secure comfort of a clip on hair topper, you'll stop wondering and start thriving. Because when your hair feels right, everything else falls into place. So clip it in. Flip your hair. Own the room.
Still nervous? That's okay—we get it. That's why Appearanz offers a free trial campaign for select hair volumizer products, so you can see the magic for yourself before fully committing.
Ready to feel the difference? Explore our best-selling mini hair toppers and find your perfect match.
Comments
No comment at this time!
Leave your comment